Submitting a preprint to a publishing or a peer-review service
Prerequisite
To submit a pre-publication to an Episciences journal or a peer-review service via HAL, it is necessary:
- to have an account HAL and to be connected to this one.
- to have obtained the agreement of the co-authors in the case of a collective article
To connect and reach the form of the deposit
- To deposit a pre-publication, go to the HAL home page.Two possibilities:
- to connect to its HAL account. For that, click on the button “Sign in” in top on the right of the screen. Once connected, click on the button “+ Upload” to reach the form of deposit;
- Click on the button “+ Upload” in the centre of the homepage then connect to your HAL account.
- Select the type of document “Preprints, Working Papers, …”. The choice of this type of document makes it possible to activate the functionality of deposit on Episciences at the end of the form.

Upload the file
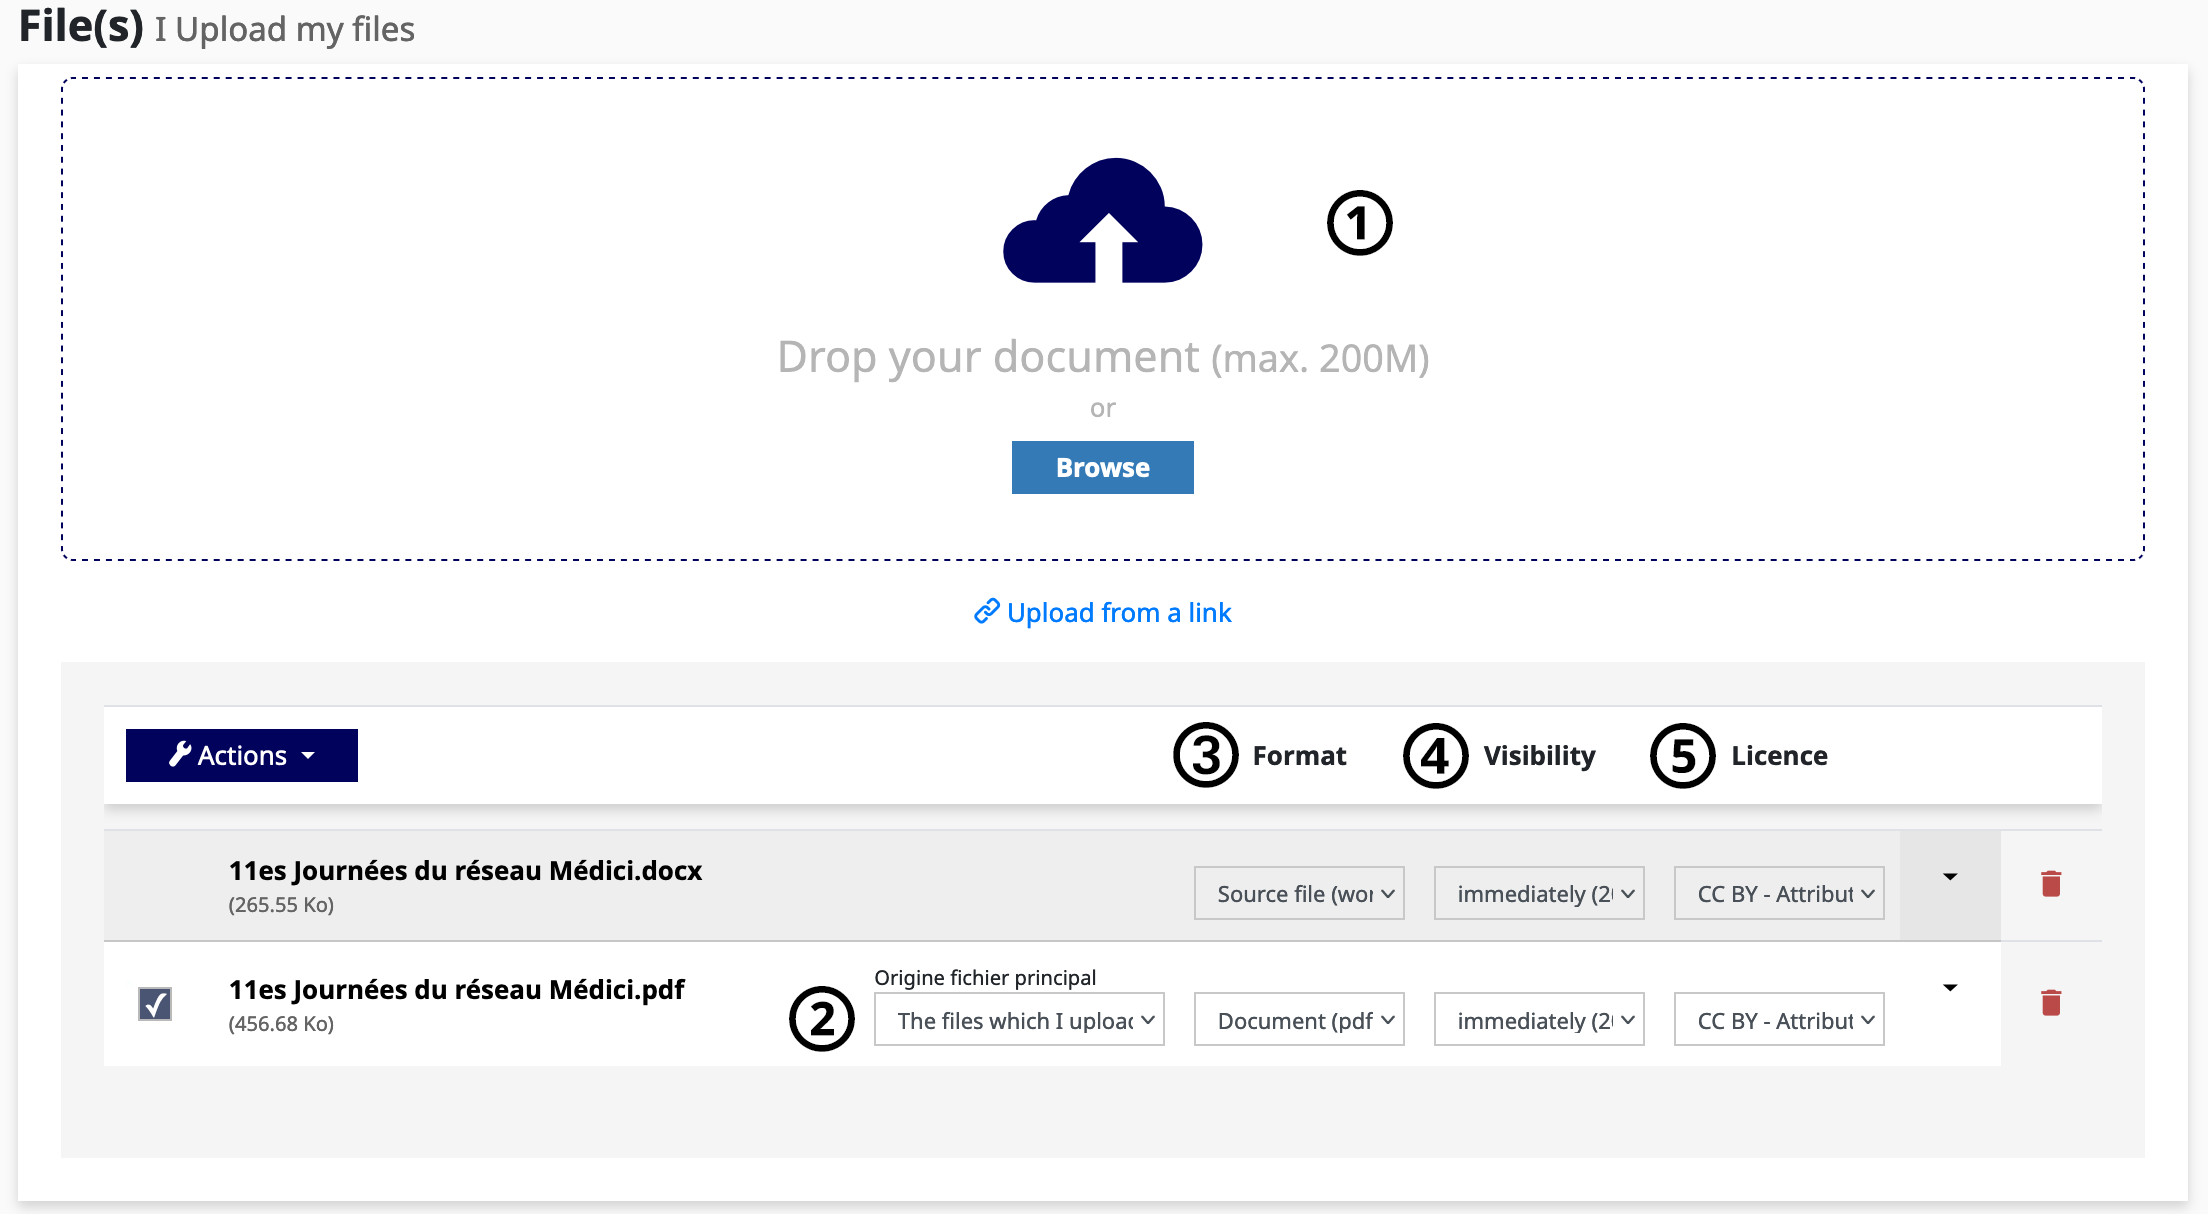
- In the “File(s)” section, upload the file to be submitted;
- Enter the origin of the main file (Origine fichier principal): “The files which I upload are author files”;
-
Enter the file format:
- For a PDF, choose “Document (pdf, jpg)”;
- For a source file, choose “Source file (word, tex, …)”. This file will be automatically converted to PDF when submitted;
- To submit an appendix in addition to the main file, select “Supplementary data”.
-
In the “Visibility” field, keep the default choice of “immediately”. All documents submitted must be immediately accessible in order to be transferred to Episciences.
- Choose a Licence: the recommended licence is CC-BY. It is also possible to choose another Creative Commons licence.
Fill in the metadata
1. Authors and their affiliations
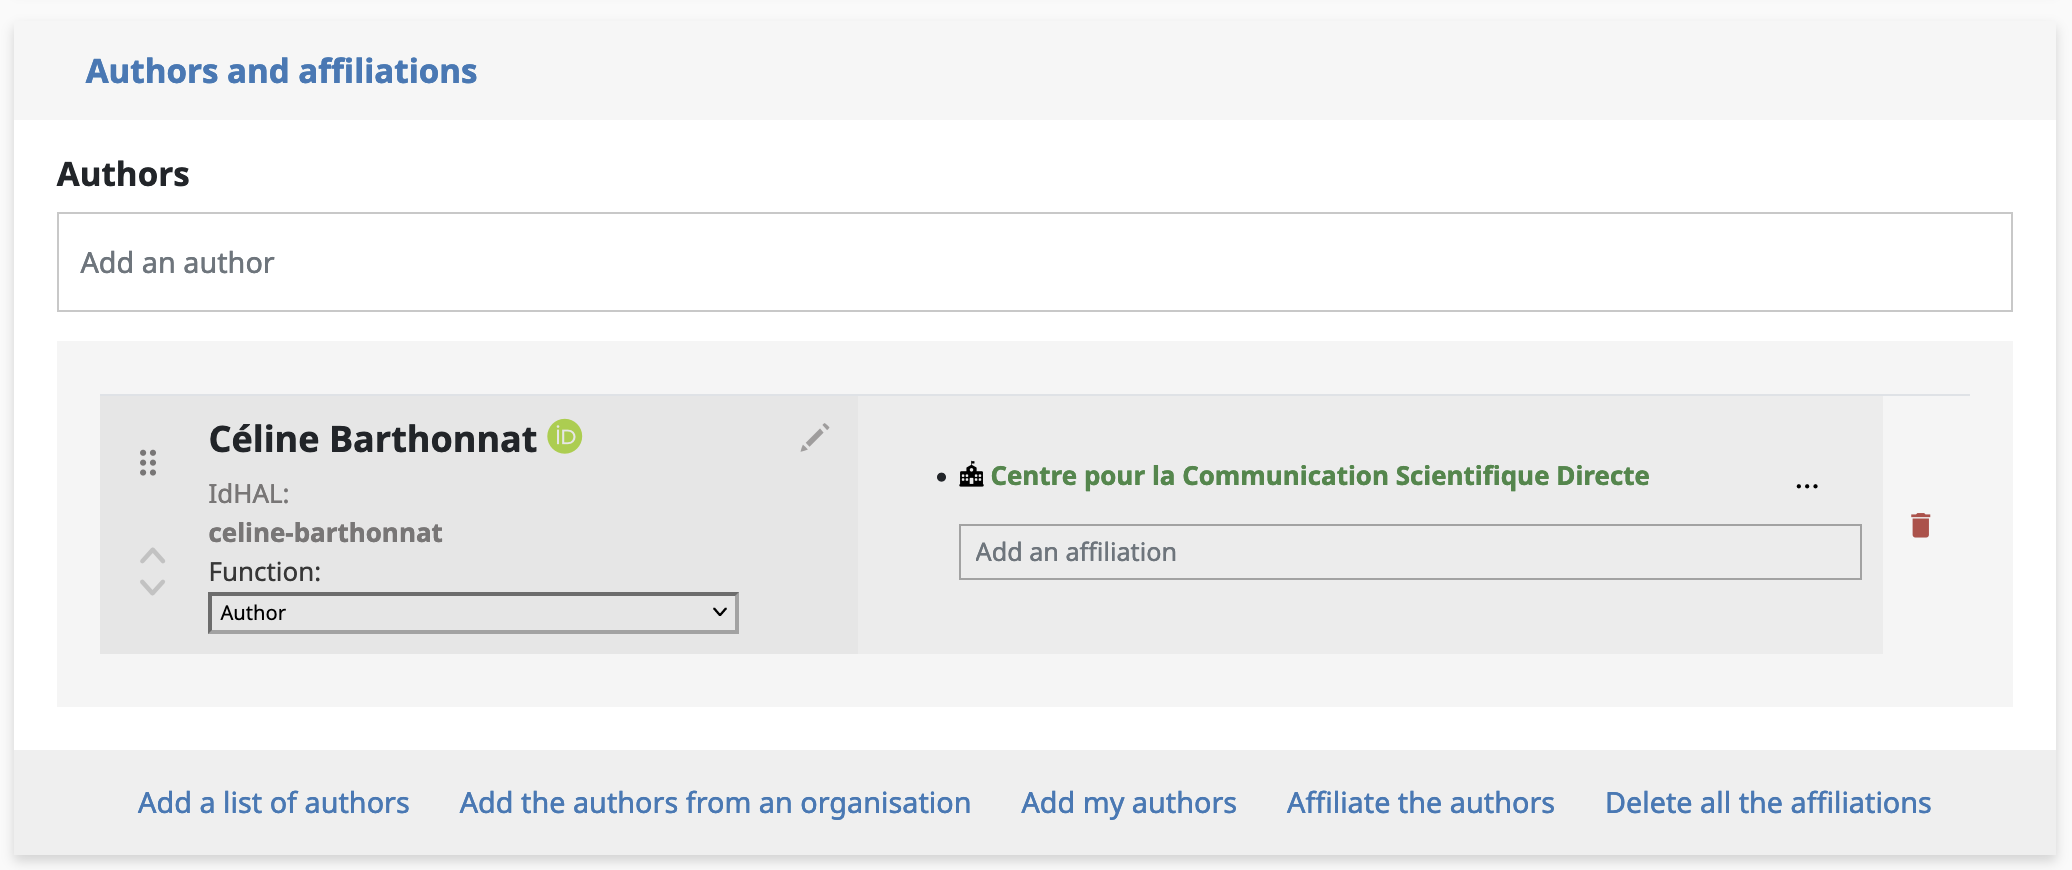
- In the “Authors” section, enter all the authors in the order shown in the article;
- also enter their affiliations.
For more information on adding affiliations, please see the section entitled “How to complete the author’s affiliation”.
2. Main information
Fields marked with an asterisk are mandatory.
- Title*: select the desired language from the drop-down list, enter the title in that language and click “+ Add”. Repeat the operation for another language if necessary;

- Domain*: select the main field of your article from the drop-down list. You can also add other fields as required;

- Abstract: choose the language and copy and paste the abstract in the chosen language. If the abstract has been automatically retrieved from the loaded document, check that everything is correct (particularly the language);
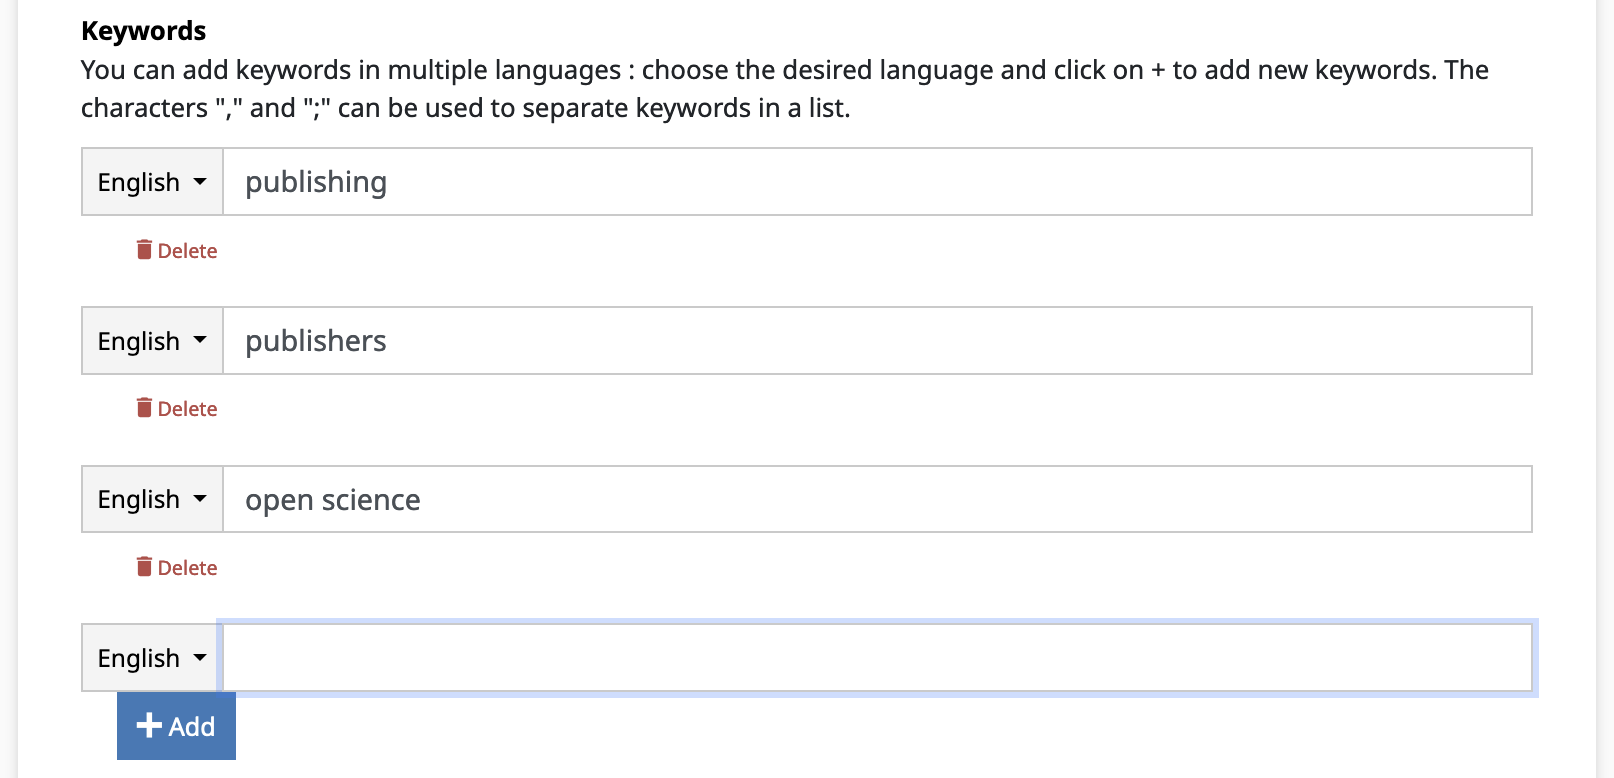
- Keywords: select the language and enter a list of keywords separated by a comma or semicolon. Click on “+ Add” to validate them;

- Fulltext language*: select the document language from the drop-down list;
- Licence: select the licence to be applied to the uploaded file (CC-BY licence recommended).
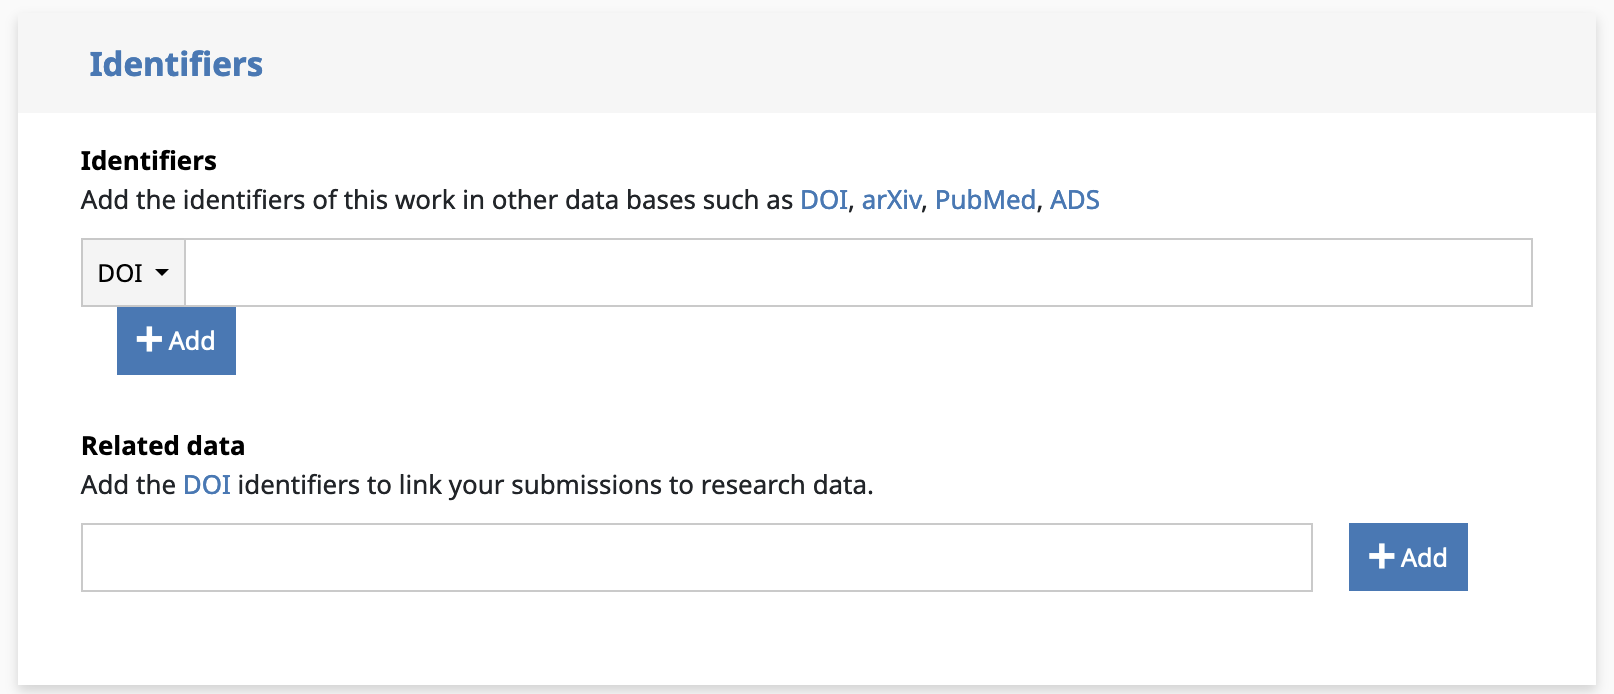
3. Identifiers
If the data associated with the article is archived in a repository, you can enter the DOI provided by the repository in the “Related data” field.
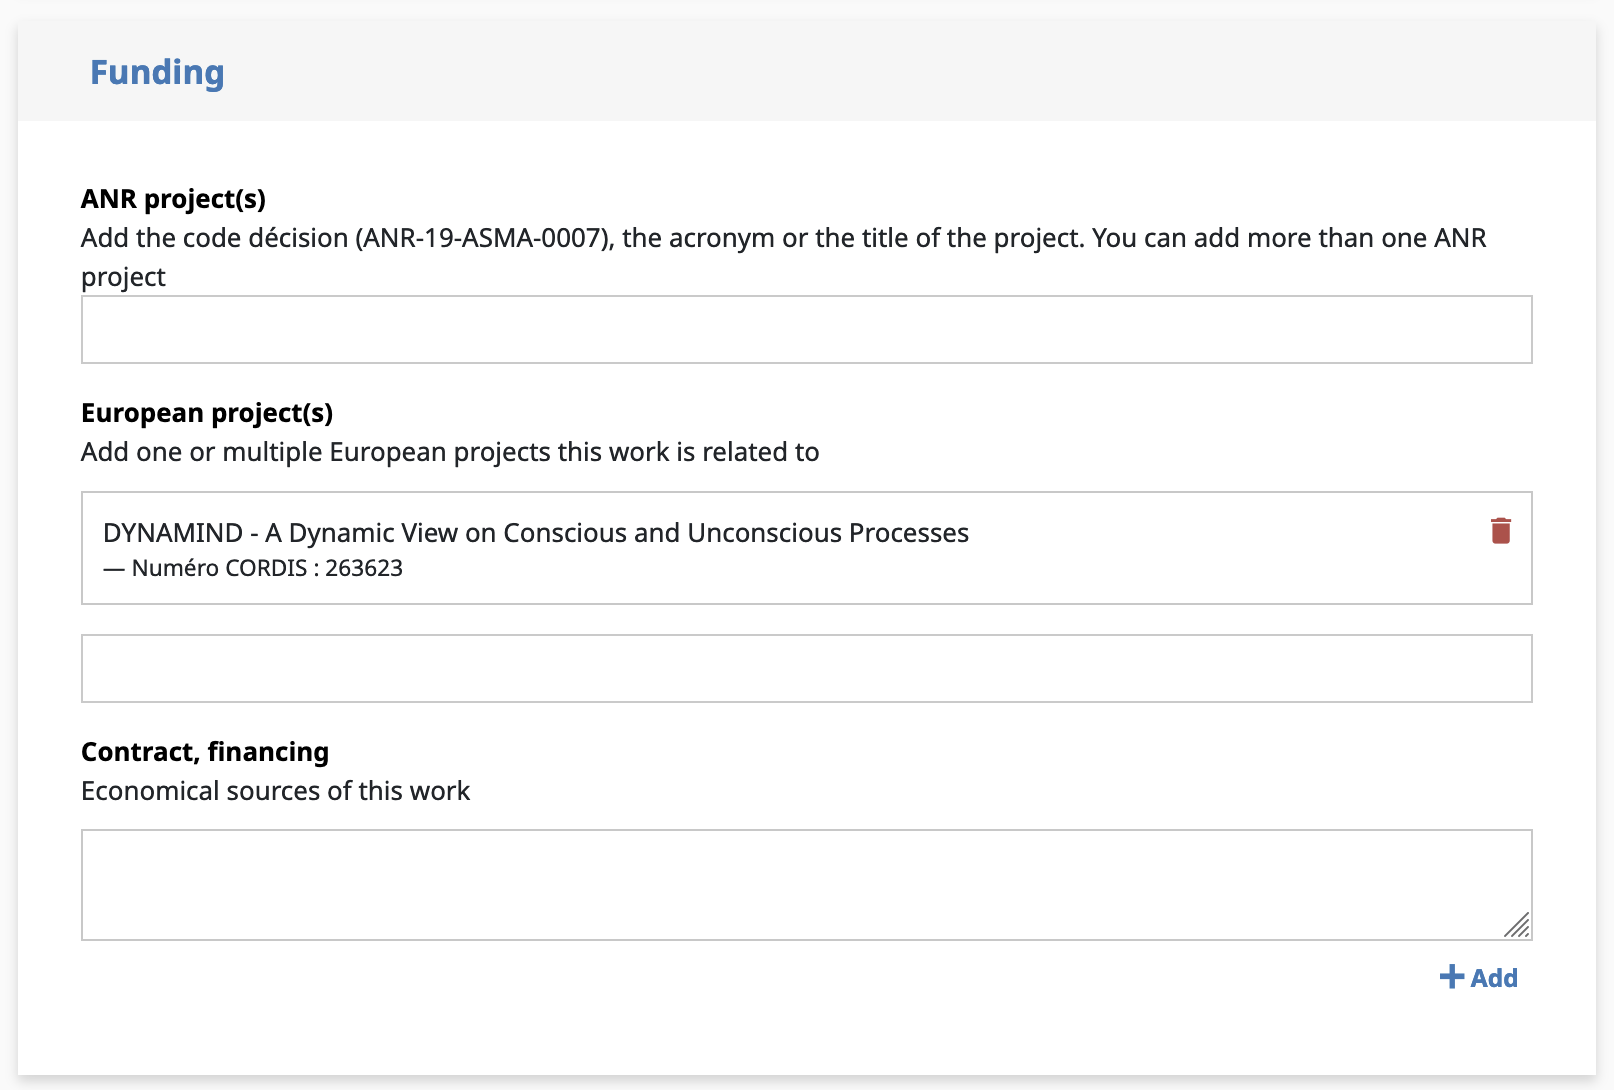
4. Funding
If the publication has been funded, you can indicate the sources of funding here.
- ANR project(s): enter the project’s decision code, the acronym or the project’s title;
- European project(s): enter the project(s) linked to the article;
- Contract, financing: if necessary, enter the other sources of funding for the article (free text field).
5. Other informations
This section allows you to enter other information such as classification, JEL or MeSH keywords, Research infrastructure, etc.
Validation
In order to finalise the application, the various validation stages must be followed.
1. Check the information in the citation
The bibliographic citation is based on the information entered in the form. Check the citation and correct the metadata in the form if necessary.
Reminder: the type of document must be “Preprints, Working Papers, …” to the exclusion of all others. Only this type of document can activate the document transfer function on Episciences.
Check the metadata carefully:
- Author: first names and surnames of all authors;
- Title of submission;
- Year of submission.

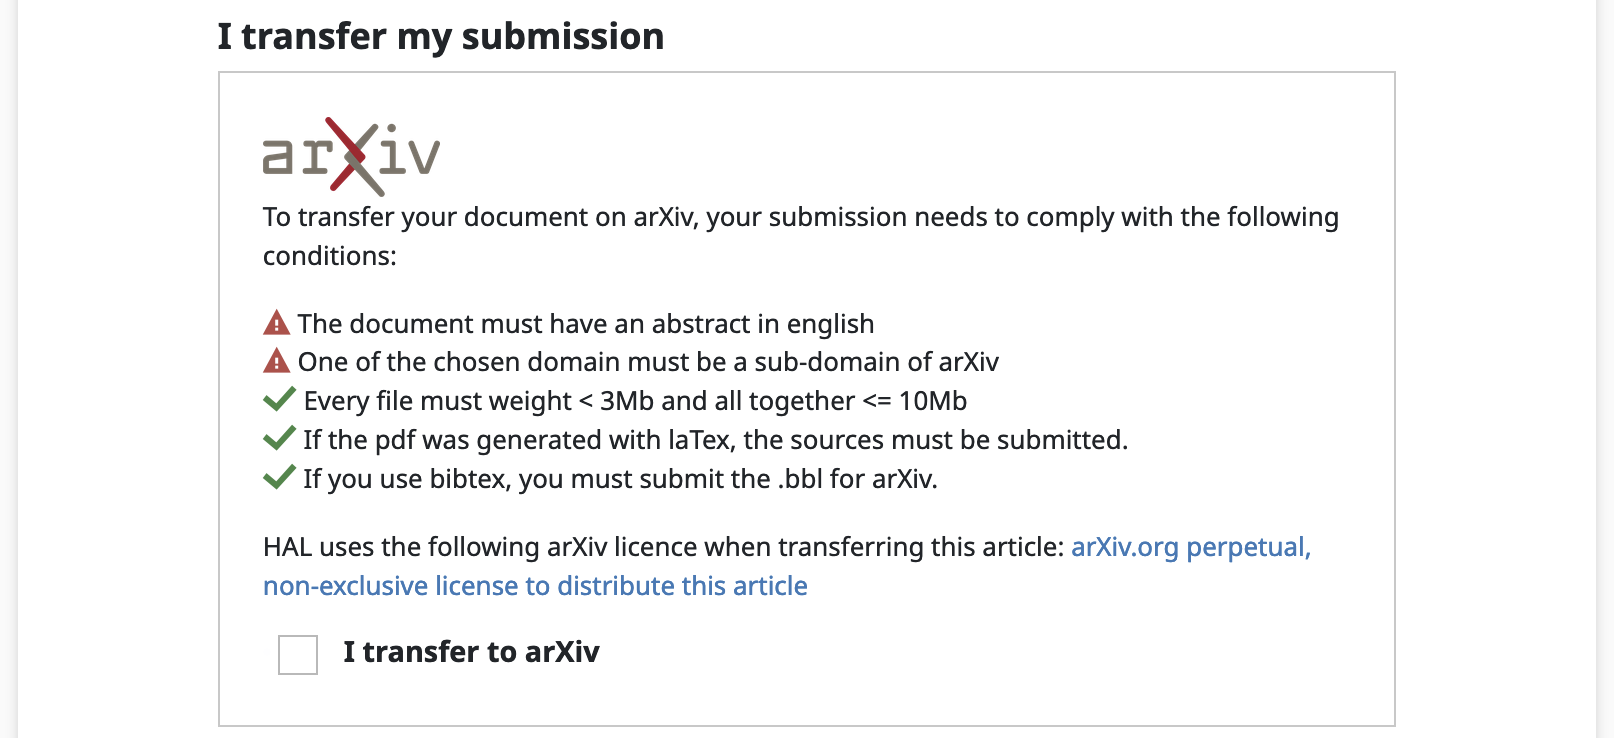
2. Transferring your deposit
If the article has an abstract in English and is related to a discipline on arXiv, it can be transferred to the open repository (conditions for transfer to arXiv). To do this, check “I transfer to arXiv”.
3. Submitting your preprint to a publishing or a peer-review service
To submit your preprint directly to an Episciences journal or a peer-review service, select the desired journal from the drop-down list.
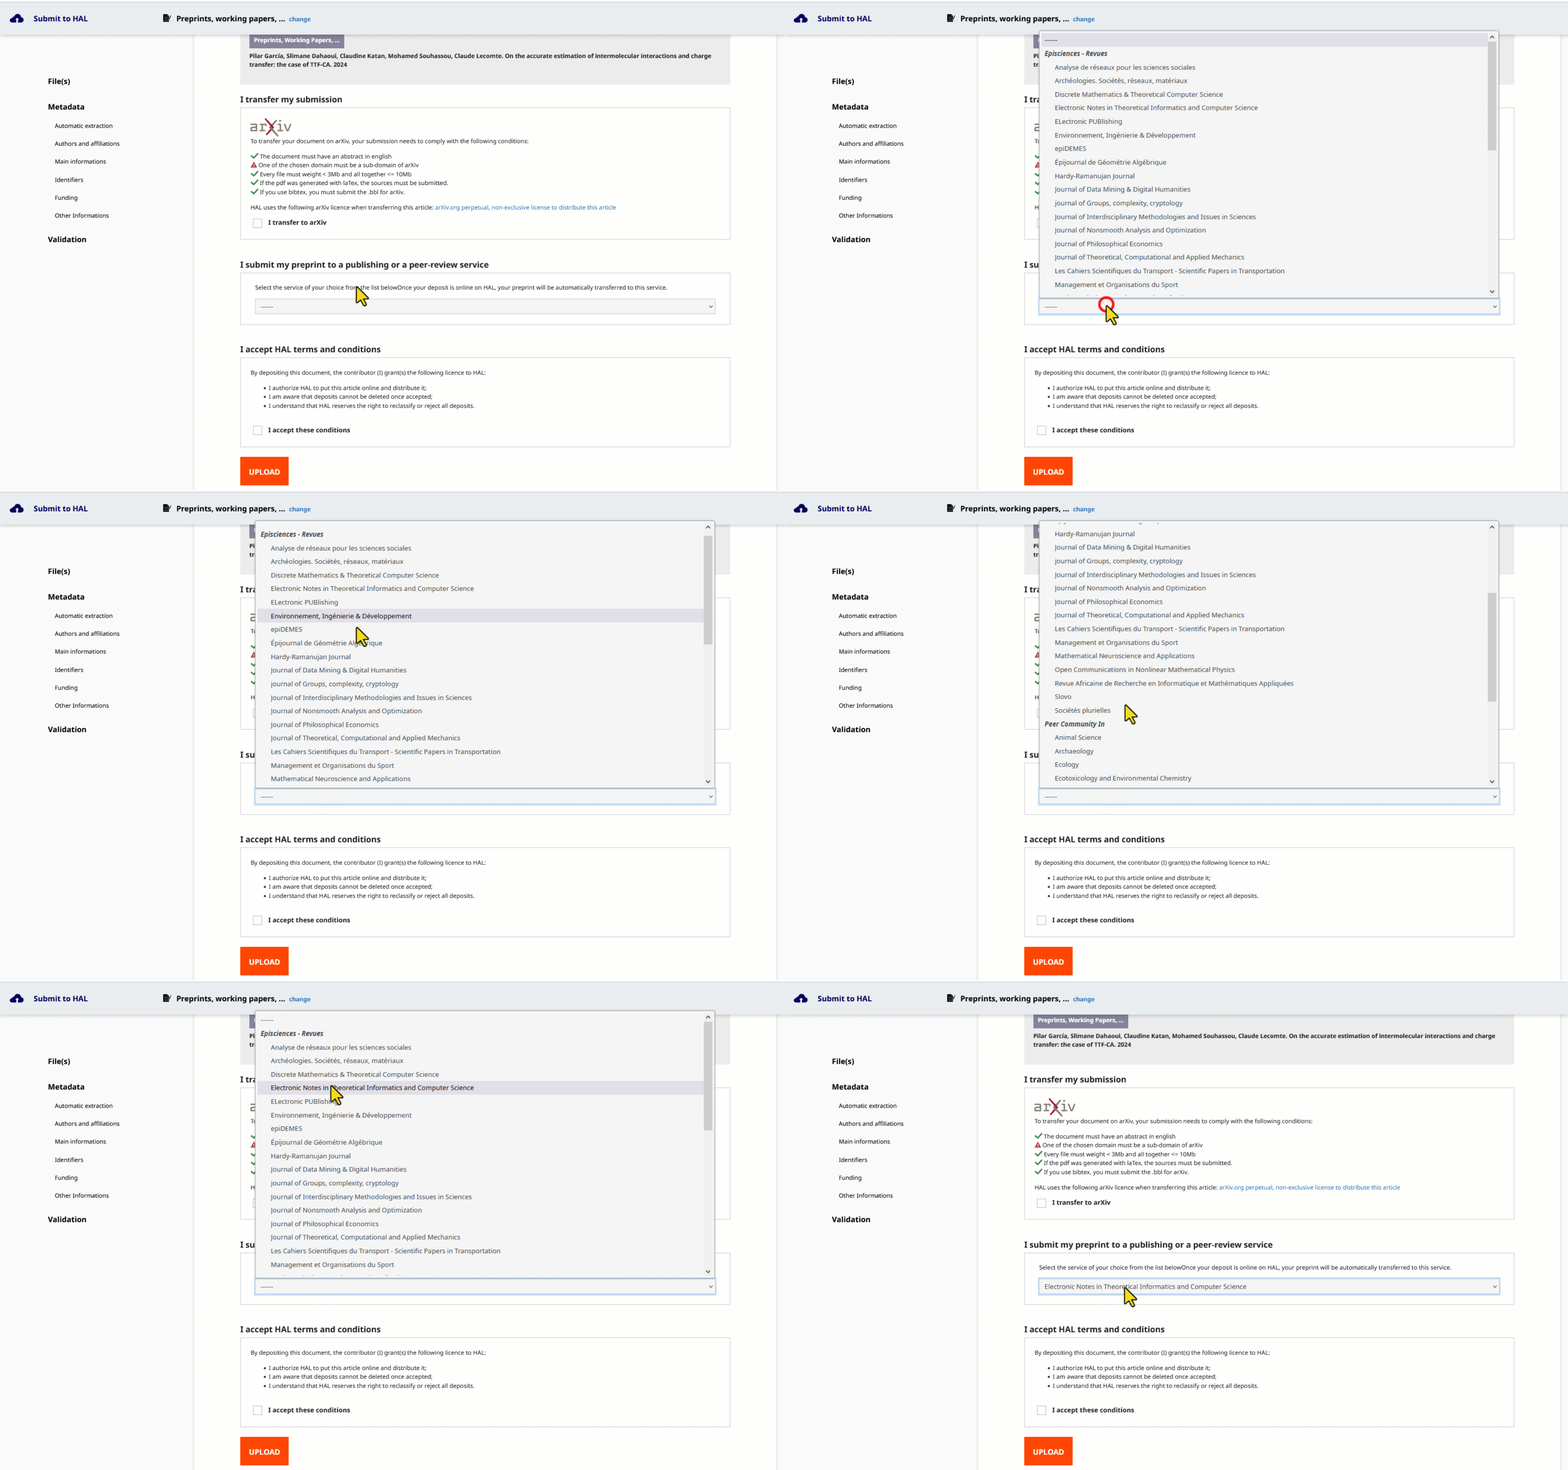
After validation of the submission form (next stage), the preprint is subjected to a human technical check. Once validated, the preprint will be available online on HAL and automatically sent to the chosen journal.
4. Accept the HAL terms and conditions
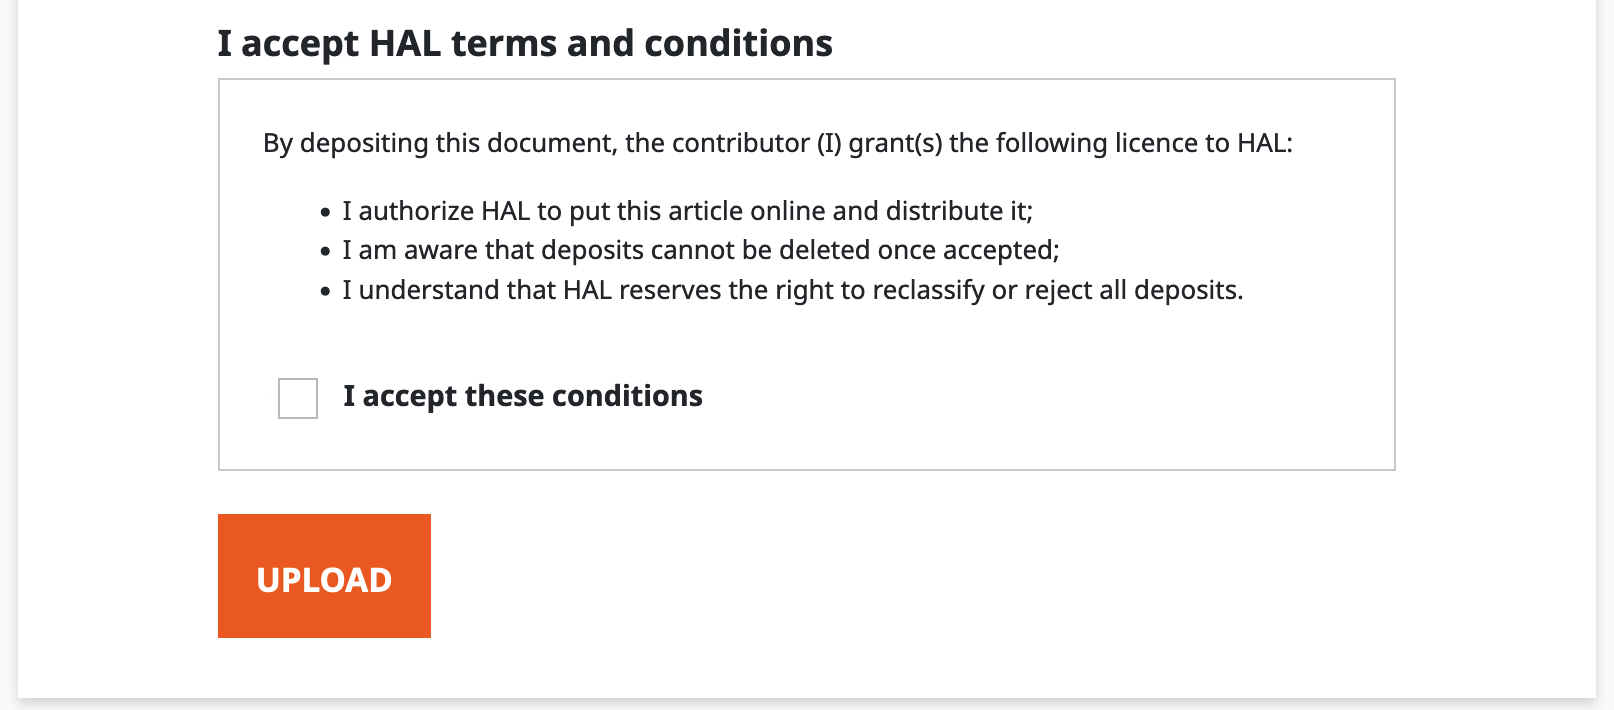
To validate the deposit, check “I accept these conditions” and click on “Upload”.
